Next to the baseplate, there was the machine itself - extremely dirty, a bronze-brown all-over. Fortunately the brown hue all-over the mechanism was a century's worth of dirt, not rust. Nevertheless it can be difficult to clean off - it is very greasy and hard.
From earlier experiments I found that the most effective way to deal with this, is warm soapy water. Warm (hot) water with a (very) generous amount of washing-up liquid will work wonders. After soaking for only a few minutes, the dirt can be scrubbed off. Toothbrushes for the more delicate bits and a hard nail-brush for the more 'rugged' parts.

Before the parts can be washed, the machine of course needs taking apart to give access for scrubbing. Disassembly was much more difficult than anticipated - the people in the Hammond factory around 1915 really torqued those screws! All obstinate screws were given a few weeks to soak in oil and even then some wouldn't budge. With some very careful hammer-tapping (risk of breaking a casting!) and making sure the screwdriver fits the screw perfectly, the essential screws could finally be loosened. (Old screws tend to have much narrower slots than modern screwdrivers expect. Screwdrivers were ground down to get a proper fit, to again reduce the risk of damaging a screw-head.)
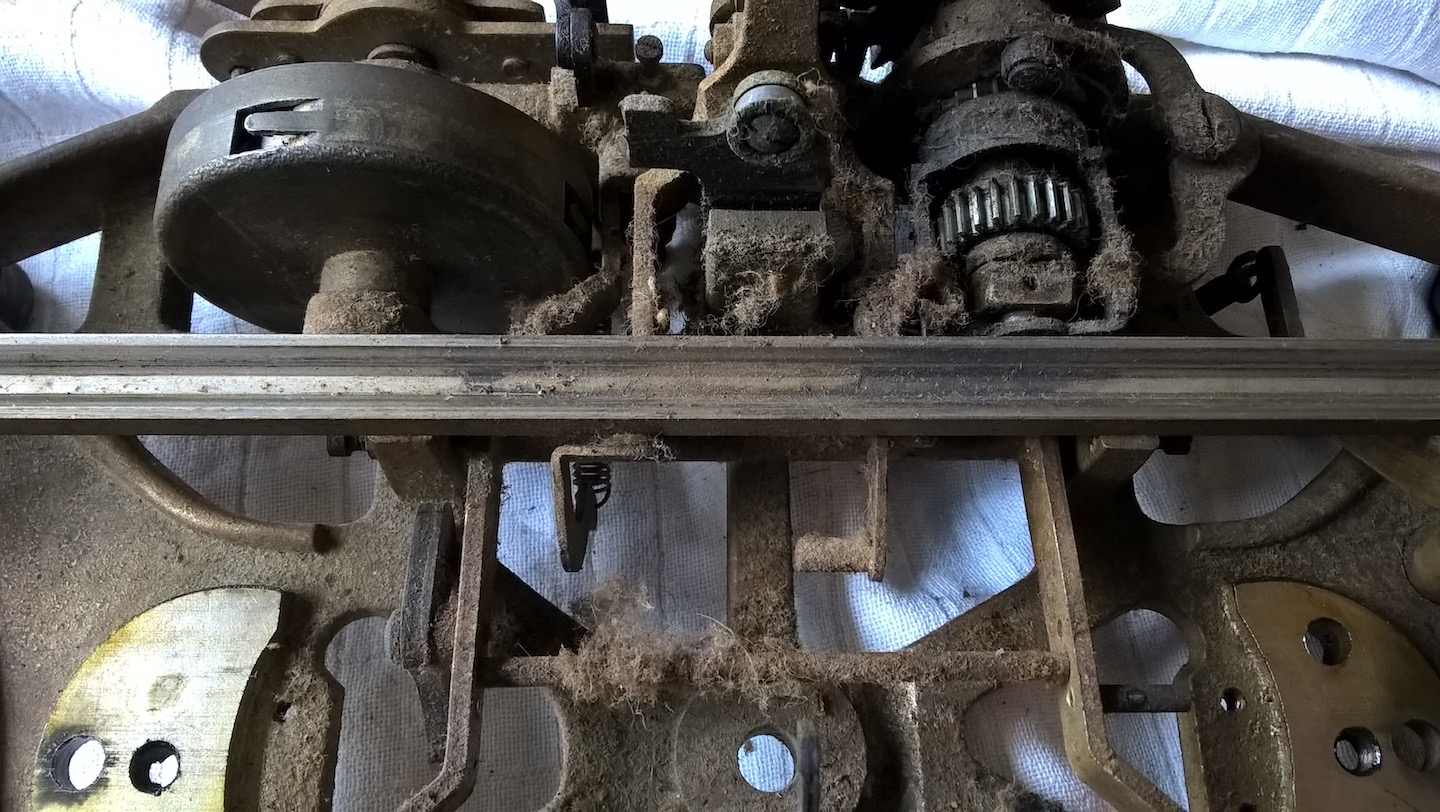
When finally the carriage came off, the escapement showed the amount of dust and dirt that gets into a mechanism over the decades. After removing the spring-drum, the frame complete with escapement was given a bath 'as-is'.
One very important step in cleaning with very-soapy-water is the drying. After rinsing off any dirty or soapy water, the cleaned part is rubbed dry with a cloth and then 'baked' to get rid of all water as quickly as possible. For the machine base; this was left in the sun on its tray for a few hours ('sun-baked Hammond!'). Other parts (e.g. the turret assembly) were dried in their tray in an oven at ~80 degrees C.
The final step of this cleaning process is to apply oil to all vulnerable parts. A light machine-oil (sewing-machine oil) was added to all moving parts and into all threaded holes, the gears were re-greased.

Net result then is much cleaner assemblies - a major difference for e.g. that escapement even without taking it all apart. Taking it apart and cleaning the individual bits would have been better, but felt uneasy about tackling those two 'stacked' rotary escapements. (A century ago, a complete machine would have been given a bath in white spirit (i.e. petrol / gasoline) - that is however quite dangerous (obviously) and a bit toxic too. This method of soapy-water, rapid-dry and re-oiling is safe and works quite well too.)
The spring drum itself was cleaned with a metal-polish - more work than the soapy-bath method, but its shape makes it doable and did not want to risk the spring with water. The spring is really very large, much larger than usual for a typewriter and more like a gramophone spring-drum. Similar to a gramophone, the lid can be pried-off fairly easily.
Forunately the spring is intact and the centre was merely unhooked from the arbor - explaining why the spring-drum would not wind. A small wedge of wood (no damage to the spring) was inserted between the centre-most windings to push the centre-hole in range of the notch on the arbor. (Some extra graphite-grease was also added for good measure.) Then very carefully assembling the spring drum and giving the arbor the time to properly catch the spring, the motor works fine.

The Multiplex uses a draw-band (unlike the 12, where the spring drum has sprocket gearing directly engaging with the rack on the carriage). This draw-band was originally probably a thin metal-strip, but completely missing on this machine. The snapping of the draw-band may well have been the cause of the arbor becoming dislodged. A new draw-band was made from a flat shoelace, with metal end-loops made from guitar-string. (The alternative of sacrificing a narrow tape-measure was considered too :-) A challenge for the draw-band is that it needs to be fairly thin as well as strong - it is wound around the spring-drum as the carriage moves to the left and has very little clearance with the frame and some parts of the escapement. Hence the use of ~0.2mm wire for the loops and the sewing-in of the ends into the flat shoestring. So far - it's been holding up under the strain :)
The key-levers are easiest to take off the machine yet turn out to be the trickiest parts to clean. The key-tops are too fragile to be all taken off the levers, so the levers can't be cleaned in the soapy-water bath. The keys themselves need to be cleaned 'dry' anyways, because of their paper inserts. To start with, steel-wool is needed to remove the first layer of dirt, then metal-polish to shine-up the nickelled part and finally using aluminium-rubbing to mask any remaining spots of rust.
Although the key-levers take a lot of time, it's worthwhile and the difference is very noticeable.
One more thing; taking off the carriage-return lever is something perhaps best avoided. This is mounted with a very tricky hidden torsion spring mounted inside a chamber around its mounting screw. Re-mounting this is 'difficult'. (Am sure the factory must have had some sort of secret tool or fixture to accomplish this.)
The machine is taking shape again - and is now nickel-coloured :-)
The Hammond Multiplex typewriter is now in a slow phase in its restoration - as a few key-levers a time are cleaned and added :-)