Saturday, August 8, 2015

Rough emery paper

Hard platens are a long existing issue with typewriters, with solutions being sought.

(From the May '35 issue of Popular Science Monthly)

After all these decades, it may of course not merely be the surface of the roller that hardens.

Not sure this is such a good idea today for very old machines. Come to that; not sure this was such a good idea back then even.

(Rough emery, yikes.)

Wednesday, August 5, 2015

One Summer

One summer: America, 1927. That's when this Remington Portable typewriter was assembled in Ilion, NY. It was made for export with a Portuguese (?) language keyboard and somehow it made its way to Holland.

Eighty-eight years later it was listed for sale online with a single fuzzy image. Just on the off-chance I put in a low offer; it looked like a machine that I wouldn't feel bad about trying a re-paint on. Bit of a surprise when I actually won it. Bit of a shocker when it arrived to see how bad it actually was...


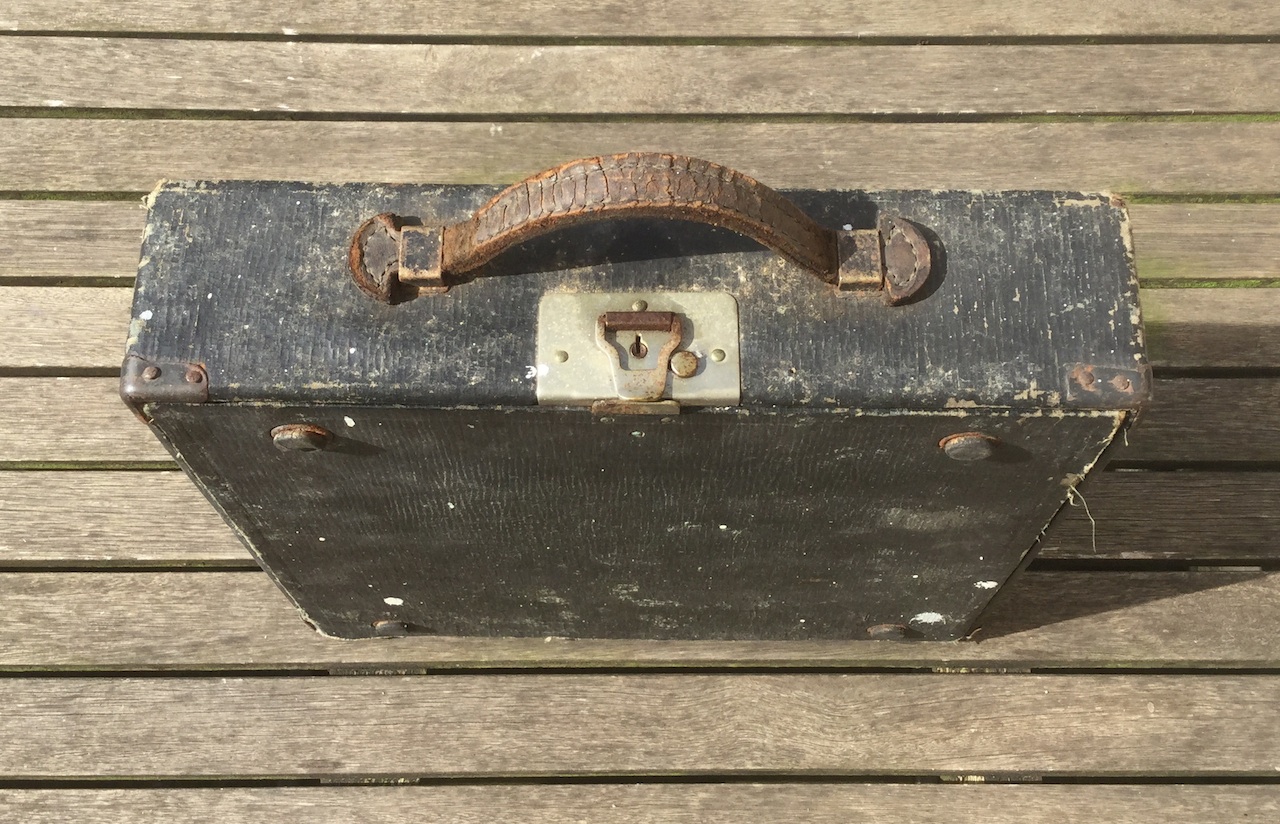
Surprising the case even made it through shipping - it had been covered with cardboard and not in a box as such. A severe case of damp. Much of the plywood has de-laminated, the leatherette is damaged and loose. Amazingly still the intact carrying handle.


It has received some knocks, the back of the lid is smashed in and cracked. The whole carrying case still holds together, mostly from sheer force of habit.

The typewriter itself then. Luckily the case was much worse than the machine itself:


The machine itself indeed as was advertised with some paint loss. The little Remington Portable of the 1920-ies is not a rare machine and in this state I won't feel bad about doing a re-paint. 


Not much left of the decal, rust even on the typeslugs.


The keyboard has some unusual characters. Very unusual for Holland, that is. The seller was not able to shed any light on the machine's origins. Now how do these (probably) Portuguese machines end up in the low countries?


This one has the extra plate at the back to (I guess) protect the mechanism. The feed rollers are all fine. The platen is pitted, dirty and hard - not the original platen though, but marked in green text as a Continental replacement.


Still works! A bit stiff at first, the typebar lifting mechanism was jammed and needed some coaxing up, but the machine still works. A bit of oil on some spots was all it took then. This is another massive credit to the people at Remington who designed and built this amazingly compact and full featured machine. After probably decades of neglect and really bad storage conditions it still functioned pretty much as designed.


It is a 12 cpi machine - surprise. Shouldn't have been surprised really, just hadn't imagined the Portable being made with anything but 10 cpi type.


Types a treat, quite smooth still.

Serial number NV72446, made in the month of July in the Summer of 1927...

Friday, July 31, 2015

Summer break

Something different;  came across this article on how to build a small monoplane.

(from the March '28 issue of Boy's Life)

Curious and it seemed simple, so with some cardboard and a bit of wood something to try.


The small monoplane is easy to build and assemble and actually flies very well. The stick was a bit thin so instead of filing a notch a small length of toothpick was glued in a drilled hole.


Having the rubber band on a launch stick as in the article is actually helpful. Especially for the kids. It is easier to launch and less chance of launching the stick straight onto their thumb (‘Ow!’).

One added modification was to make quarter inch pencil markings on the stick. This makes it easier to experiment with the position of the wings on the stick (and restore after a crash-landing). The positions as drawn by Kenneth S. Gurney actually do work best - he probably experimented a bit as well :-)


Nice one for the summer break!

Friday, July 3, 2015

Before and after pictures (polish and India ink)

Having tinkered a fair bit with the Remington Portable #2 typewriter, had a look at the one image of the original online listing that I saved. On the left 'before' picture of the seller's listing, the 'after' picture now shows the touched-up machine. Still definitely an old and worn machine, but 'cleaner'.


The case had the obvious insect and arachnid droppings of course (i.e. the 'white paint splatter'). These spots can be individually scraped or chiseled off with a sharp tool like a sharp screwdriver. Only then is the black shoe polish applied to revive the Rexine (or Leatherette). This adds some black again and also softens the brittle covering with new wax. If done the other way around, these spots will still be visible.

The front of the frame had some bare spots and rust. These were carefully rubbed smooth, followed by painting black with India ink using a small, soft brush. This gives a deep black and a modest shine that matches the black lacquer reasonably well. (Spools were more badly rusted than was obvious from the listing image, but these were easily sanded and re-painted.) A permanent marker pen can also work, but especially for larger surfaces this can get stripey. Also the black ink (dye) in these pens often have a blue or brown hue, whereas the pigment (soot) of India ink is quite black.

Rust on edge of paper table

Still rust, but now blackened

Rusty patch on the typebar lifting tray

Still rusty, but much less noticeable

Being careful with the worn and corroded decals, some light touching up was done on the wordmark. Doesn't show very well in photo's, but can be seen a bit on the 'o' in portable. Using a gold marker pen a very small amount of new gold ink is put on a work patch. Then using a frayed toothpick this is spread carefully to make flat and match the overall texture of the decal. Again, the decal is still old and worn, but there's a just little bit more of it now.


The machine had much more mechanical tinkering done to it, but just these basic cosmetic items can make a lot of difference to a machine's overall appearance.

(And make it much more acceptable to have around :-)

Saturday, June 20, 2015

Power of Brasso

Started cleaning of a newly arrived small black case. The clasps had a brown hue and the rest of the fittings were a dull grey. Amazing how the power of Brasso can bring it back - must have been very shiny when new with all that chrome, flashy even.


Right side now given a first polish, left side as it was. Very versatile and useful item; Brasso!

(And from the case it may already be clear to many what the newly acquired item now being polished and fixed-up is. Comes with a promise of a 14% better chance for success!)

Friday, June 12, 2015

A machine's potential (and Remington Portable linefeed improvement)

When using older machines, you form an opinion on how they perform. (And judging from this post over at The Typewriter Revolution, opinions are indeed formed :-)  All types indeed must have their strengths, weaknesses and idiosyncrasies.

With older machines however, how that one specimen performs is only partly due to its construction and design. To probably a much larger part it is the consequence of the way the design and the specific machine has aged, the use and abuse it got and the various storage conditions.

It is when having more than one of a particular machine that have aged very differently that this becomes possible to see and experience. The two Remington Portable #2 typewriters I now have were produced within 6 months of each other. It seems logical that when new, these performed generally identical. In practice however, these two felt very different to type on. Actually very lucky that these two had very diverging properties when used. Where the one machine had a very heavy carriage return, the other was featherlight. Where one machine had a very heavy touch (more than 100 gram), the other was light (~70 gram) and snappy. Et cetera...


It is the one machine showing how the design can perform on one aspect, that then triggers the search for improvements to make sure the other also reaches that level of performance.

For example the linefeed; on the black machine this was a bit stiff - on the red machine light. Without the red machine, would probably have put the linefeed with the short lever down to a design property - Remington Portable #2 machines have a bit a too short linefeed lever for comfort.

The red machine working like a charm however prompted a closer look at the linefeed mechanism of the black machine.

Took a while for the penny to drop, but then realized that the small roller that holds the ratchet on a line position was not rolling on this machine. It was dragging over the ratchet, pressed down into the position by the spring against the friction over the teeth.


After a very small drop of oil and some nudging of that little roller, it started to roll freely again. So no longer does the linefeed lever have to drag (friction) the roller over the ratchet, but it rolls over the teeth with only the spring force needing to be overcome. This also makes the linefeed more reliable and regular, as the spring no longer has to overcome friction in pressing the roller down into the line position.

Unlikely to need this, but for tweaking a bit further the risk can be taken to loosen the (left) mounting screw of the spring holding the roller a little. When keeping enough tension on the spring the screws still stay firm, otherwise a small washer or shim behind the spring can be good to use.


The difference made by the simple making-free of the roller was surprising. Now also the black machine is very easy to work with, the carriage return and the linefeed can easily be operated with a finger (the pinkie even, if so desired :).

Without the example of how it could perform, would probably not have found this simple issue.

Now wondering; what little issues are hiding in other, singleton machines?

Saturday, June 6, 2015

Remington Portable with new feet

Carrying on the steady tinkering with the Remington Portable #2 typewriter, on to the machine's rubber feet. After nearly 90 years, the machine's feet that are part of the cushioned fixing to the case bottom have lost their shape and resilience. If the feet are still present at all, that is. Also on this black machine, the feet seem to have melted and given way before solidifying like stone.


As replacement, new rubber grommets of a right size can be fitted. These can however be hard to find and a grommet of the right diameter (for a 15mm hole) rarely has the right heights and inner diameter.

This led to the question, could one-off replacement feet be manufactured? (Well, of course that is always possible, but what is meant is within reasonable expense too :)  With flexible materials in black, an FDM (Fused Deposition Method) printer could be used to manufacture a set of feet with the correct dimensions perhaps.

Some time ago had some experience with Arnitel. Parts made from Arnitel are fairly resilient like rubber, however not grippy at all. Similar for the fairly standard Flex-PLA (Polylactic Acid) materials, flexible rather than resilient and not grippy. Recently there is added a new material to the palette with the tradename Ninjaflex, a PU (Polyurethane) with according to spec sheet a durometer value of Shore 80. It also is grippy.

Looking at the remnants of the tired old feet and taking measurement of the hole in the machine frame and the pillars on the base, the likely shape of the original feet was drawn in CAD in 3D. For printing in Ninjaflex on an FDM printer, this proved however to be not an ideal shape. Over several iterations, a 3D geometry was developed that works well on the machine and prints fine in Ninjaflex (From left to right in images below).


The first test prints were all done in red Ninjaflex, the final functional feet in the black Ninjaflex. The one key dimension is the outer diameter of the top flange, that should be 15.5mm +/-0.2.


This iterating in design was actually made possible by an online service (www.3DHubs.com) that provides access to thousands of 3D printers. Via this service it is possible to find a 3D printing hub globally locally. For this project I was very happy to be able to work with Martin's Hub, a local hub with fast turn-around and solid know-how on the printing process with Ninjaflex.


With the successful design file, a set of feet was ordered and printed. The old feet were removed from the machine. (Not a rare machine and the feet were rather far gone, so felt no qualms about removing these.) The front feet were indeed hard like glass, the rear feet turned out to have a consistency of licorice - weird what happens with rubber over time.


With this latest design of the printed feet, these are a simple press-fit into the holes in the machine's outer frame. The new feet have a very firm grip on the table with the smooth flat base and fit nicely over the pillars of the base of the case. With the machine screwed to the base, the screw holds against rubber again and not wedge the metal pillar itself, so again the optimal cushioning of the machine to the base.


Both my Remington Portable 2 typewriters now have new feet and sit very firmly either on their base or on the table.

In case you have an RP2 machine (there are many around still) and it has disintegrating or missing feet (many will have), you may well want to get yourself a set of newly printed PU feet.

The 3D file for printing can be downloaded here or be downloaded from Thingiverse here. Then take the downloaded STL file of the feet and upload it to 3DHubs. (You will need to make an account in case you don't already have one.) Choose the amount of prints you want of the part (e.g. 4 pcs :-)  Then you can select a local hub that can print in Ninjaflex in black or of course select Martin's Hub and have the parts then mailed to you.


With the 3D file uploaded and a hub selected, you can order the parts via 3DHubs. After a few days (or perhaps hours, as the case may be), you can pick up the feet or have them in the mail heading towards your typewriter.

Will be very curious if and how your experiences are with this!


New technology keeping old technology in parts :-)