Tuesday, June 20, 2023

An old refurbishment - stripping off the paint

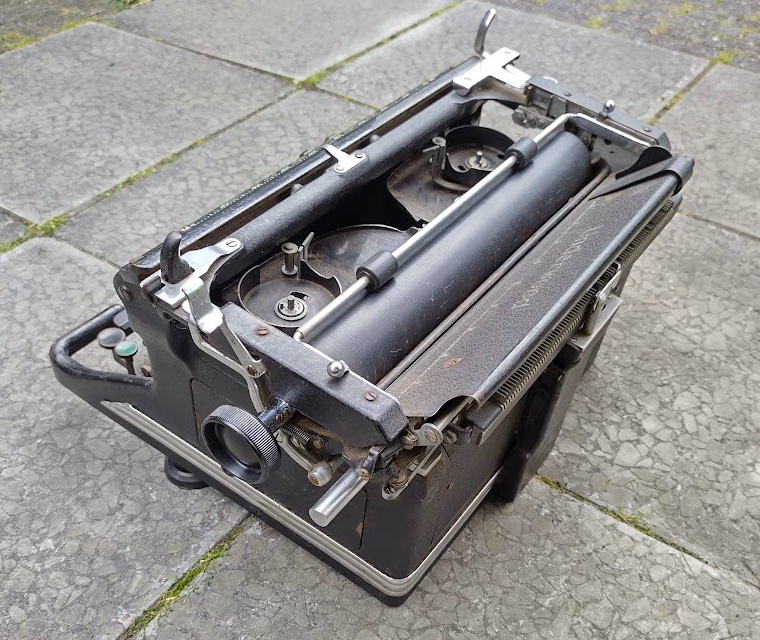
It looked quite awful, so the housing was taken completely apart. A mottled greyish-brown paint was all over the machine, almost certainly applied during an overhaul in the 1940s or early 1950s. At that time, many old Comptometers were re-furbished (scroll down to 'refurbed machines'), both by Felt & Tarrant distributors and by others. (Oh, and I can confirm that the four sides were not separated for the spray-painting on this one.)

The cork that is glued to the inside of the side-panels (sound-dampening) can be removed - using a sharp putty-knife to break the brittle glue and carefully bending the cork sheets to release them from the fold-over flanges. The top-plate cork is riveted, so that is left on the panel.

To strip-off the old refurbishing paint, a set-up with lye is used. The stripping-tray is the first step; that is a baking-tray with lye or sodium hydroxide or drain-cleaner - on the right. The mixture is made with about 50 to 60 gram of NaOH pellets per litre of water (a bit over 1M) and stir gently with a plastic or wooden spoon. When the solution turns clear again, it's ready for the parts to be placed in the solution. 


The pliers are used to handle the parts, taking care to avoid any splashing or spilling of course. The lye is not too strong, but still best to not get it on skin. In case of mishap, the tub of water is right there. The brush is used to test for softened paint that's ready to come off. The lye solution may take a few hours, but old (pre-acrylic) paint will eventually succumb and come away.


The second process-step is a tub with plain water. This is to rinse and dilute any lye still clinging to the parts as they are taken out of the stripping-tray. The stiff brush is then used to scrubb softened paint from the part in the clean tub of water. If paint still remains, the part is returned to the lye. Parts usually get several repeats before all paint is gone. 

As last process-step the parts are given a final rinse in clean water, dried off with an old towel and placed on the rack to dry in the sun.

On these particular Comptometer panels, the greyish-brown paint came off to reveal the original dark-copper finish. With a quick waxing, the side-panels actually look too good to be re-painted (as originally planned). The rivets in the front S-panel suggest a dealer-plate and the scratching of the rear-panel probably is from removing an inventory label before re-painting. Likely this was a trade-in that got refurbished to be re-sold.


Unexpectedly however, the top-panel was plain steel and not copper-plated. Very likely then that this top-plate is a replacement - after heavy use, the slots can be worn-out to become wider and need to be replaced.


The original plan had been to completely refurbish the machine including re-spraying it in bronze/copper, but with the decent condition of the side-panels, perhaps only the top panels will get a re-paint.

This was a local, low-cost pick-up purchase, that seemed to have all keys still present in the listing. When we picked-up the machine, it indeed had all keys. Unfortunately, at the time of refurbishing this ±1920 model H, the keys were replaced by a then-modern green-ivory set. These are made of very badly aging plastic, the ivory keys basically crumble under so much as a hard stare; it no longer has all keys.


It's all turning into more effort than it's worth for a pretty common 8-column model H Comptometer, but a fun project anyways. This 1920 calculator will get another overhaul now in 2023 similar to the one it got in the 1940s. The housing will be re-finished, mechanism adjusted and all the keytops will be replaced by new-manufactured black-white keytops. (It just won't be used quite as much as it was after the previous refurbishing of the 1940s.)

Wednesday, June 7, 2023

Making new spools for the Hammond typewriter

Spools for the older models of the Hammond typewriter are quite large and made of hard-rubber flanges and a brass hub. Being as exposed on the machine as they are, and brittle too, many spools are broken with sometimes shards missing. That the paper-rest folds down right onto the edges of the spools also won't have helped.

They have a very distinctive design with textured and smooth areas and text around the hub - the spools are a noticeable element in the overall appearance of the Hammond.

Although one of the spools of the Multiplex was 'fixed' with card sections to make it usable, also wanted to try making 'whole' reproduction spools. One way is to make a press-mould from a good original side and then cast new flanges from e.g. sealing-wax or polymer clay - as shown in this video. However, first wanted to try 3D printing a new spool.

Taking measurements from an original, the flanges and hub were modelled in CAD. The lettering was traced manually over a scan of the spool in a vector-editing program. This traced drawing was then exported to CAD to create the raised lettering on the inner plane. A feature not (yet) modelled is the textures. (There is one extra difference between the CAD model and originals, one that'll make them readily identifiable as reproduction :-)

The parts were then ordered 3D printed in black resin. After getting the parts, they needed only minor sanding of the flange-holes to make the flanges a press-fit on the hub: a new Hammond typewriter spool!

With some more sanding, also the hub is a proper press-fit onto the capstans of the machine. In the image below, the reproduction spool is placed on the Hammond Multiplex (right capstan). Compared to the original spools there are differences, but overall the printed spool 'fits the machine'.

The resin printing process created a fine weaved-cloth-like texture over the whole part that actually works quite well. The outer and third 'rings' were lightly sanded. These 'rings' were then given a single coat of black paint to further smoothen and create a visual contrast with the texture of the second ring. This contrast is not as distinct as on the originals, but on the whole it's a credible impression of a Hammond ribbon spool.

This was a proof-of-concept for 3D printing reproduction spools. So far, conclusion of this test-print is that 3D-printing in resin seems to be a viable way to equip Hammond machines with replacement spools - and shortly will give this Multiplex spare spools :)

Monday, June 5, 2023

Sighting of a couple of Sholes and Glidden's and a Writing Ball

Sightings; seen last weekend - Sholes and Glidden typewriter serial number 1681:

Right next to it, another Sholes and Glidden typewriter (or type writer), this machine with serial number 2698:


And only a few feet away an original Malling Hansen Writing Ball. 


These rare machines are part of the typewriter section of the HNF, the Heinz Nixdorf MuseumsForum in Paderborn, Germany. Even though only a small selection of their typewriters (over 500) is on display, there are several rare and grand machines to be seen on display, many in great condition with shiny nickel.


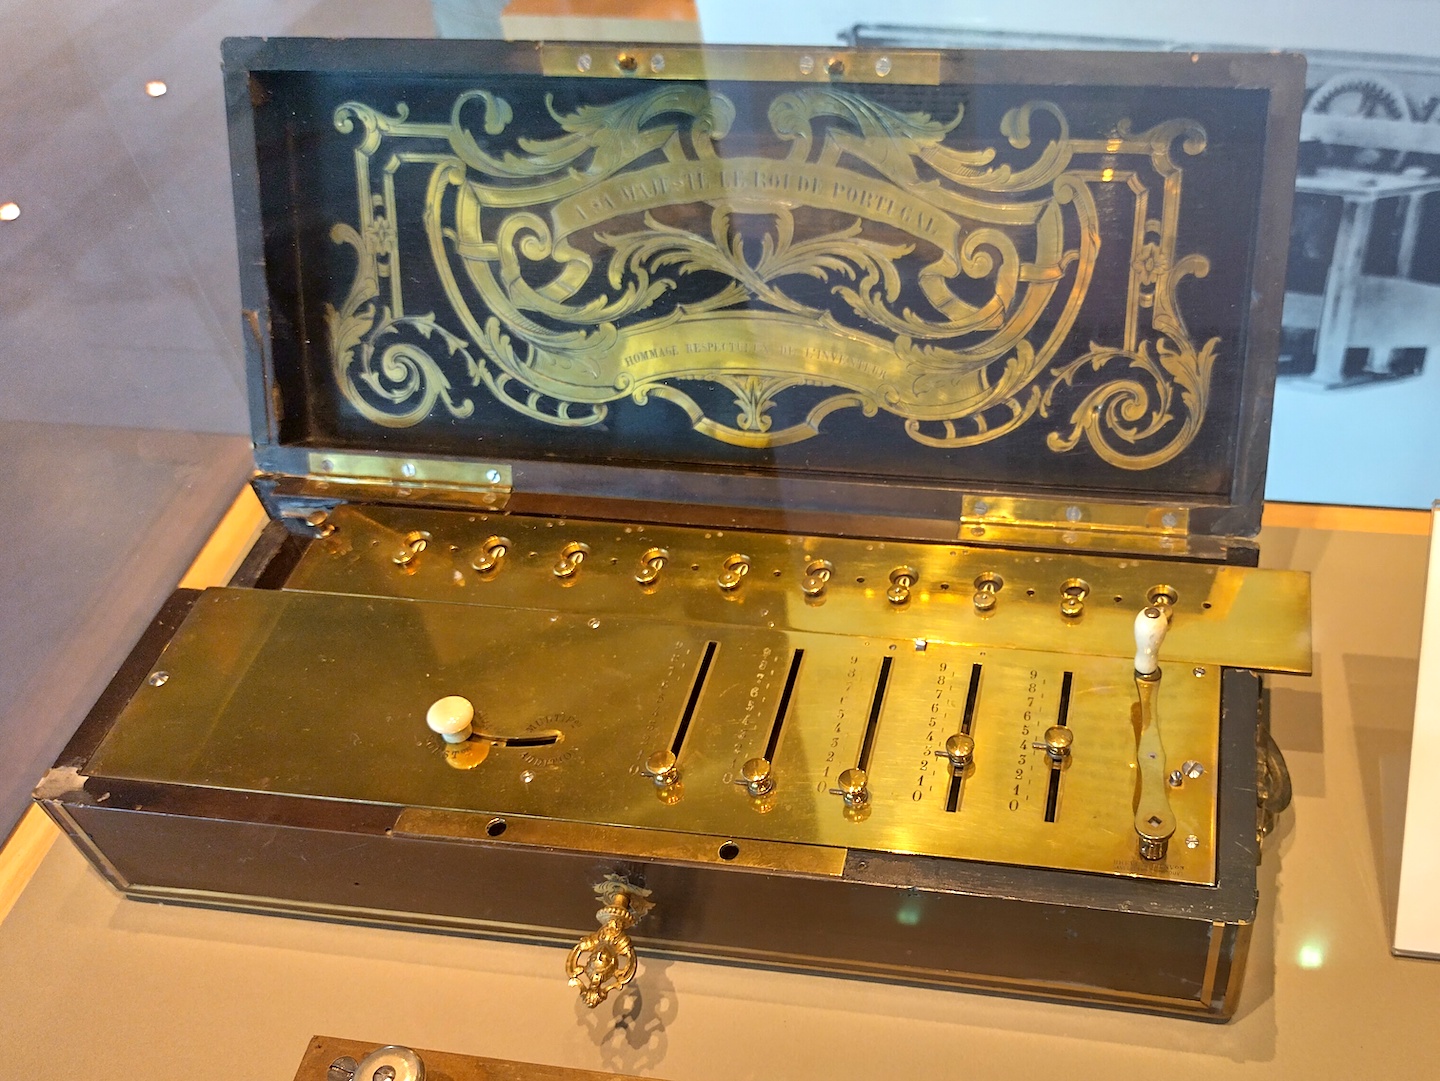
The museum showcases the development of information technology in the broadest sense, from early beginnings all the way up to modern computing. (From clay-tablet to a Cray2 :-) On show are a.o. several beautiful examples of the early stages of mechanisation of calculating, such as this ornate 1855 Arithmometer.


A visit to the HNF had been on the wish-list for some time. The IFHB meeting around the 400th anniversary of Schickard's calculator (calculating clock) held at the museum in Paderborn gave the push to now really go there for meeting and museum both.

Easily spent two days exploring the museum's collection - well worthwhile :-)

Thursday, May 25, 2023

Big Underwoods are in the area

Not often seen in-the-wild at thrift stores around here; large Underwood standard typewriters.

The first standard spotted was this venerable Underwood 5.

Sharp-angled front plate, so pre-1923. Has a backspace, so post-1907. No variable line-spaced pull-out knob, so pre-1914 or so. At least a century old then. 

There should be a serial number there - the area is however covered in orange-red rust.


With a bit of spit & rubbing, it became readable. Nice, curly, old-fashioned numbers. Later checking against The Database, serial-number 287069 makes this I think a 1908 machine. 

It seemed complete and mostly undamaged, but rather rusty.

Although it is was a magnificent typewriter, this amount of rust and a 30 Euro price-tag meant it stayed put at the thrift store.

The second standard seen was a modern, streamlined Underwood SS.

It is a strange machine; on the one hand looking modern with the crinkle paint and chrome trim, but it still has the basic old-fashioned shape of the original early 1900s Underwood. Could be said to be a dressed-up Nr. 5 almost, but actually nearly every part is re-designed; all castings are different, the linkages are different and it's got segment shift. But it still very much echoes the Nr. 5. 

This machine was missing the left chrome trim, had jammed-up keyboard, mixed-bag key tops and did not work. The state of this typewriter probably destines this one for recycling. Many (most) of the big standard machines offered for sale never get bought and will ultimately end up being handed in as scrap for recycling.


The serial number 11-6195525 would make this a 1947 machine. Am not very clear on the actual model-names for this period, but I assume this is an 11" platen model SS.


The draw-band is present, but flopping about the insides. That's only one reason the carriage doesn't move, the escapement also doesn't work when pulling the carriage along by hand.

Although as a post-war machine it's outside my collecting scope, this is a big standard that I did actually buy - for the reasonable sum of 15 Euro. Two metal spools included (already taken off in the pictures).

Before this one's eventually going into the smelt, parts will be taken off to fix other machines. (The parts salvaged a few years ago from a rusted-up '29 Remington Portable fixed several machines already.) This big, damaged standard will also provide US-threads slotted-head screws - otherwise hard to get here.


Still a very imposing typewriter - very heavy too :)

This one will be a parts machine, donating bits to repair other machines.

Friday, May 19, 2023

Small cosmetic tweak; red ribbon selector on the Underwood 5 typewriter

After testing it on the reference Underwood 5 typewriter, and seeing the difference a proper bright-red key-top makes, also wanted to replace the faded paper on the color selector key of the 'good' Underwood

This machine however, had the nickel key-ring very firmly in-place. The word 'limpet' did spring to mind.

Knowing that in case of serious mishap there'd be the reference-machine to donate a replacement, decided to try to force the keyring off. After carefully bending the tabs open, the red key was placed with the glass-side supported on a stack of cardboard disks. Gentle taps on a sharp screwdriver held on the edge of the nickel ring then got it loose, without any damage to the glass. Then going round, tapping the ring to make it move off 'straight', the keyring came off with only one small nick on the lower edge where the screwdriver pushed it. Barely visible, especially when mounted to the back and out of sight :)

With the ring off, the glass disk comes out for cleaning and a new paper insert can be cut out. In this case two disks of red paper were stacked over the original, faded paper (that had fused with the metal cup). The side of the cup was cleaned from dirt and corrosion, and then the keyring pushed back firmly on the stack. Very gently bending the tabs to finish, and the switch can be placed back on the machine.

A small, cosmetic tweak - that somehow does make a difference for the whole appearance of the machine :)

(As practice for more cleaning on the Underwood 5 to fix a now-sluggish 'S' key, first started with cleaning the segment and type-bars on the reference machine.

Once you get the hang of it (but only then), type-bar removal and placing-back is surprisingly easy on the Underwood No. 5.)

Sunday, May 14, 2023

Impression strips for the Hammond Multiplex typewriter

The Hammond typewriter uses two wear-items; the impression strip and the ribbon shield. These two items were originally sold at modest cost by the Hammond Typewriter Company. The ribbon shield is essential to print cleanly without smudging by adjacent characters. The impression strip is important to even-out and dampen the impact of the steel hammer through the paper onto the hard-rubber type-shuttle. As is advised by several sources; Do not type on a Hammond without impression strip!

From literature and some pictures found online of surviving originals, these strips were probably made of rubber vulcanised onto a cloth base. The reinforced ends have holes that allow the strip to be stretched over the pins of the typewriter's carriage.

After making several new ribbon-shields, the second wear-item -the impression strip- is relatively straightforward to make.

Because there may be some variation between machines in the actual distance between the pins, start with measuring this span. Also the vertical pitch in case of two pins. Drawing these dimensions on a sheet of paper (or card) gives the template for making new impression strips.

Several materials can be used to create new impression strips, e.g. cutting to length from 1mm rubber sheet ~15mm wide. For reinforcing the ends thin aluminium sheet (e.g. scraps from making the ribbon-shield) or metal-tape can be glued to the rubber - these help with the appearance and strength of the ends. 

Punch the holes (~3mm) at a few mm less than the span of the pins on the template to give the strip some tension. This then quickly makes new 'platens' for the Hammond.

The more fancy (and easier) way is to use electrical- or insulation-tape. This is low-cost and available in colours too (fancy impression strips!). This material is 'stretchy' and will cushion the impact of the steel hammer similar to rubber. Because it is 'stretchy', reinforcing the ends is essential. Otherwise the holes will distort and the strip will crease. For this, simple card-scraps are included in the 'tape-sandwich'. For extra strength and to further limit the risk of creasing, a cloth ribbon is added in the middle of the strip. (As bonus, a cloth-core is also prototypical :-)

To start with, a length of black 15mm wide electrical-tape is itself taped over the template, adhesive-side up. The card end-pieces are pasted in-place on the tape, again allowing a few mm for tension when mounted on the pins. The end-pieces have the holes and the desired outline marked in black (i.e. in high contrast).


To suit the desired 'weight' of the strip, one or more extra lengths of electrical tape can be very carefully placed over the base-layer between the card end-pieces - again adhesive-side up. Take care to let the tape 'recover' after tearing off a length and before adding it to the strip being formed. It is a slow-deforming material, it does 'relax'.

In the same way, a length of cloth ribbon is placed on the black tape between the end-pieces. Also here do not stretch it, but place it onto the stack without tension.

Unless the cloth ribbon is exactly same width as the tape, cut away the excess width. Either now as or later as a last step, cut away any ribbon that protrudes over the sides. If using a scalpel with a ruler, use very light pressure and multiple passes to cut - the strip is elastic and would otherwise deform and mess-up the straight cut. Scissors will work too.

To add the back of the strip, one or more layers of another color electrical tape - adhesive-side down of course. In this case brown. The reason for using a color is that these are translucent and the outline and location of the holes can still be seen.

With hole-punches and scissors the ends are cut to the desired pattern. (Hole-punches are by the way surprisingly expensive, but also surprisingly one of the more useful tools for this tinkering around typewriters.)

This type of tip is much fancier than the square-ended original Hammond impression strips. It does however look 'nice' and ornamental, in keeping with the machine itself. Also, the fancy-ends pull-tabs could be justified by saying these make mounting of the strips easier ;-)


It remains to be seen how well the electrical tape stands up to the striking of the hammer over time.

In case this impression strip wears quickly (although a Hammond of this vintage is today not a machine to be used extensively), it is easy and low-cost to make several spares. Variations with different thicknesses are also easy to prepare. 

(Also duct-tape was tried as ingredient for making an impression strip, this however was not ideal. The weave-texture does not help with clean impressions and duct-tape is prone to creasing under tension.)

Friday, May 5, 2023

He Dunks Typewriters in the Kitchen Sink

When a typewriter mechanism is very dirty, with congealed oil, dust, eraser crumbs and general dirt, I've resorted to dunking the whole mechanism in soapy warm water. Using a lot of washing-up liquid and thoroughly drying and oiling afterwards it works, but still felt a bit 'uneasy'. (Also taking care to not get the keys wet, water would get under the glass (or celluloid) and mar the card keytops.)

Stumbling on an article in the February 1957 issue of Popular Science magazine, this dunking in soapy water is actually recommended as a method used by professional repairmen too. With illustrations, using an Underwood portable that would've been ~30 year old by then.

The article:


On page 215 it does say that paper covered with glass should be kept out of the water, but the spraying with water still seems a risk to the paper keytops, would be hesitant about that. One other thing is that I've not yet dunked a machine in our kitchen sink. Have been using an old, large baking tray instead.

Other than that, the article pretty well describes the method. 

(Admission; I did place a machine in our kitchen oven at a low temperature setting to thoroughly dry it :-)