Friday, March 4, 2022

Brightening of glass typewriter keys (of the Erika M)

To brighten the discoloured glass-topped typewriter keys of this keyboard,

to make all keys have an even brightness and squeaky clean,

they were all removed from the machine,

and collected in plastic bags. In the bags there are then 49 typewriter key rings, 49 glass disks and more than 50 cardboard keytops.


For proper typewriter-repair there exist special tools for removing and for replacing key-rings. As a hobbyist or 'tinkerer' I've no such tools - on this typewriter the key-rings are however held on by tabs and not a press-fit and not corroded onto the key-base. This made a full keyboard-refresh still feasible, the tabs could be carefully coaxed open and the keys taken off one by one. 

To brighten the keyboard, all the individual parts of the keys were cleaned and new set of keytop labels were made to be placed over the top of the original cardboard keytop labels.

The nickelled brass rings had quite heavy corrosion. A rubbing with metal-polish did not have much effect - gently scrubbing with fine steel-wool was needed to clean them up. Pitting in some spots was made less noticeable by the aluminium-method.

The glass disks were all cleaned with soapy water, a wooden skewer was needed to scrape off the dirt-rings. The glass was surprisingly dirty, even in the disk-centres. After washing, the glass tops lost their yellowish hue and actually came out very bright and clean again.


Taking off the keys also confirmed that this is a Dutch machine that was modified with Norwegian characters. The 'new' keytops are of a different typeface, and also a smaller diameter, thinner card. The original card keytop was thinned-down to accommodate the new label on top when the machine was changed, probably back in 1937. For the other key, the thinning-down removed the lettering, so unknown what the original characters were for that one.


To create new inserts for the keys, the card keytop labels were scanned at 1200dpi resolution. This gives about 660 pixels across a label, enough for editing and decent quality printing. All the labels were then digitally cleaned. This was fairly straightforward by simply removing the label background and only keeping the black (very dark grey) marking. Never noticed it before, but it turned out that several letters have a tiny white dot in the lower-right of the character. Perhaps an aid to prevent accidentally reversing transparencies in the total printing/preparation process? (See e.g. the 'B' and the 'O' in below image.)


The re-touched, cleaned labels were then printed at the highest quality setting on a laser-printer. A fairly thin, smooth ivory-coloured paper was used. In hindsight a thicker paper (e.g. 120 grams) could possibly have been better - more opaque. Thin paper was used because of wanting to keep the original cardboard keytop labels on the typewriter,  to fit on top without adding too much to the height of the stack held by the ring. 

To protect the sintered toner, the printed sheet was given a coating of protective 'artists' varnish. This seals the toner, makes the surface smoother still and will help protect against moisture.


This varnish unfortunately also made the paper half-translucent, so that the original letter of the old label would show through underneath. Thicker paper maybe would have not had this problem... For this smooth, thin paper it was however solved by painting the reverse first with white paint and then a layer of grey paint. After experimenting on a blank bit of paper with different paints, a water-based acrylic modelling paint was used that did not warp the paper and also had excellent coverage. 

These two extra layers on the bottom made the labels completely opaque, yet still thin and with a nice, smooth ivory finish on top. (One original 'M' label shown for comparison in the image above, next to it one new label upside-down showing the grey reverse. The labels are on a white background.)


The original colour of the tab (and backspace) key could still be seen where the label had been protected against fading by the ring. Because it is hard to predict colour when printed - several labels with different shades of red were added to the printed sheet. A simple, 100% red-toner turned out to be the cleanest and a good match for the machine.

The new, thin labels were fixed on top of the old labels with small dots of glue from a 'glue-stick' on the edges. This prevents rotation and also should allow them to come off again without any damage to the visible part of an old label - i.e. it is a reversible restoration. The new labels were placed in exactly the same orientation on the original, i.e. the same way 'up'. This was done to help in re-fitting of the cardboard to the key-bases.

Next a glass disk was placed on top and the stack 'fed' into a ring - given a firm push to fully seat it in the ring. For orientation, the cleanest, least-corroded part of a ring was chosen to be in front, to be in view.


Dots of glue were placed on the key-base, exactly as was done originally in the S&N factory. Every key-top stack was then pressed onto its key-base and the three tabs folded-over. The glue should prevent the labels from rotating. For most keys, the cardboard keytop label still had an impression of the key-base embossed, this made the cardboard 'fit' the base and will also make rotating unlikely.

The tabs of the key-rings are of course the weak element; brass does not like bending. Replacement key-rings are not so easily sourced today, so there'd be no easy way out in case of mishaps. Luckily, only one of the 147 tabs broke off - there were also two that started to crack, these were 'stabilised' with a spot of cyanoacrylate glue in the crack.

The overall outcome of the entire procedure is a cleaned, bright keyboard with the original graphics that does not look too 'new' or out of place. The original labels are still present on all keys, so in principle this is a reversible restoration. 


This barn-find wreck-machine is starting to look very presentable - a very rewarding machine to try to fix-up :)

Sunday, February 27, 2022

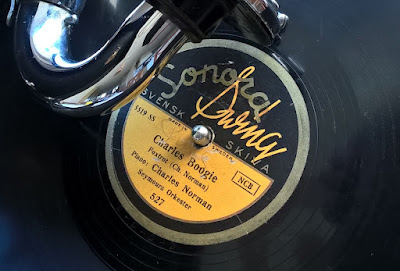
Charles Boogie

Thrift stores are open again - on a treasure hunt with all the kids. There's something to see for everyone. Among the yards of bins with vinyl, one solitary shellac disk was lying on a bottom shelf - no sleeve, but still good. A lucky find :) 

The man behind the counter didn't want anything for it, waving me through - please take it. Still, that doesn't quite feel right, so paid 50 cents for the record to 'own' it. With a nice bright label, Sonora Swing! Charles Boogie, performed by Charles Norman accompanied by Seymour's Orkester. 

Released in April 1941; orchestra's were still swinging in Stockholm.


Just played. Definitely boogie woogie - happy find! :-)

Saturday, February 19, 2022

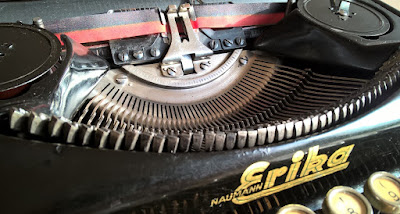
Thoroughly cleaning an Erika M typewriter's segment

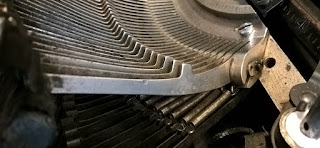
To give the slots in the segment and the typebars themselves a thorough cleaning, the segment was removed from the machine. There was only so much that could be cleaned when still in the machine, the slots were fairly gummed-up.

Very unlike the tricky carriage assembly, taking out the segment of an Erika M typewriter is surprisingly straightforward. The segment block and also the type-guide are doweled, so they can be taken off and re-mounted without losing their adjustment. After removing the mounting screws the parts can be pried off, taking care with the dowel-pins. At both ends of the segment-block, a screw with a little plate holds the pivot-rod in place. 


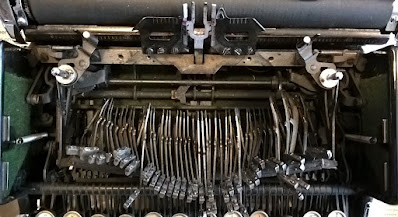
By the way; on the outer typebar can be seen some 'dimples' - this is likely where the typebar was peened for some final adjusting after soldering in new type-slugs. This was probably done as the machine was customised with added Æ and Å characters when purchased new.

Removing these little plates allows the pivot-rod to be pushed out. The typebars then can be slid out of their (gummy) slots. The segment-block is then completely free to be taken off for a proper cleaning. The typewriter does look a little dejected then...


The typebars cannot easily be taken off the machine, because the linkages have been riveted. A benefit of this is that the typebars cannot get out of order - the typebars are not numbered. (The number '1' that can be seen on the right-most Å typebar seems to indicate the type of bend it has, there are three '1' typebars, then three '2', followed by all '3' bars to the centre of the basket.)

The segment-block was thoroughly cleaned with white spirit (petrol sans additives) and polished-up. Working a rag and then cardboard strips through the slots helped to remove all the hardened dirt. The typebars were also polished-up (Brasso) with stubborn dirt first scraped off (wooden skewer). After this, both the segment and the typebars are smooth and clean again.

Then the segment can be re-fitted. Simply start inserting the typebars at one end and passing the pivot-rod through one typebar at a time. When they're all in, then the segment can be pushed onto its mounting-bar and fastened.


Clean, smooth typing-action again :-)

Tuesday, February 15, 2022

An M's not Made for Maintenance

The Erika M typewriter is a magnificent writing machine, but it may not be the most maintenance-friendly machine. To give it a proper cleaning and to get at the feed-rollers of this 'barn-find' project machine, some disassembly was attempted. Removing the platen seemed a logical, basic step.

  • To remove the platen-rod, the bracket around the paper-release lever has to be removed.
  • To remove the bracket around the paper-release lever, the carriage side-plate has to be removed.
  • To remove the carriage side-plate, the platen-rod has to be removed. (See point 1.)

Turns out that by loosening the side-plate screws (to give it a smidgeon of play) and a bit of luck with wiggling the bracket, it can just about be manipulated out between the platen and the side-plate. Only then are the set-screws that hold the platen-rod revealed. Loosening these then allows the platen-rod (and knob) to be pulled out and then the side-plate simply screws off. (Oh, first take off the tabs-clearing lever of course).

Lots of felt and lots of dirt to be cleaned away.

This is a proper puzzle, this is.

(Still haven't figured out how the paper-guide can be removed from the paper-tray...)

Thursday, February 10, 2022

Cushioned feet for the Underwood portable typewriter

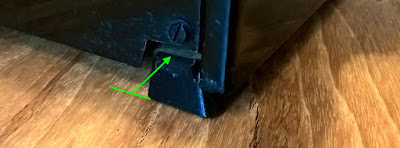
The feet of the Underwood Champion portable still needed replacement. These Underwoods of the Typemaster range of the late 1930s have a slightly more complicated feet-arrangement than most machines, but replacements can be manufactured with 3D printing and basic materials.


The newly printed parts include rear-feet with a fold-up flap for buffering against the rear case-clamps (right-most). Then two rubber bushes for the front mounting-screws of the housing and left of them the front feet. The front feet are made of two parts, one rubber 'foot' and a hard-plastic flanged-bush to fixate them. Additional basic material is self-adhesive felt-pad (for furniture) and a tube of simple textile glue, i.e. latex. (The 3D models of the various printed parts are downloadable here in a zip-file archive.)


The rubber feet of themselves are somewhat dampening. To make 'cusioned feet' to further improve the noise-reduction, a layer of felt is added. The feet-base has a recess that takes a felt-pad cut to size. To give the felt grip, these are then given a thin layer of the textile glue. Of itself this does not adhere very well to the felt, but when 'tamped down' it will entangle in the felt and stay put. This gives the felt excellent grip when the weight of the typewriter is on them. 


This Champion still had front feet, however these fell apart when trying to wrest them off the machine. The front feet of the Typemaster machines have a flange that was originally pushed through a hole in a tab of the machine frame. When the rubber was new and soft, that would have worked, today the rubber is fragile and the flange just comes off. 

The new front feet are made of two parts; the hard-plastic bush is put through the tab from above, the rubber foot is then a press-fit on the bush. This hard-plastic bush is hollow, because this has to fit over a prong in the carrying case. Two tabs protruding from the inside-rim of the shell keep the feet from rotating.

The front screw for mounting the housing-shell looks like a regular foot-mounting bolt, but it isn't. It should hold a rubber block between the shell and the frame for extra sound-dampening. This rubber was long gone, now replaced with a rubber bush.

The rear feet are more conventional, these screw on as is expected for pre-war typewriters. First glue the flap into place, folded over in the slot in the top. The raised-lip should naturally be at the rear of the machine, otherwise it won't fit. These prints should have been about a mm longer towards the rear - the flap now is bent outward, but it'll have to do.


This raised rubber flange provides a buffer between the machine frame and the bracket that holds it in the carrying case. A lip of this bracket slides into the machine, just above the rear feet.

The original rear feet were, by the way, no longer really fully present - these had gone 'liquid' and then partly congealed on the rear clamps in the carrying case.


These remnants were chiseled away and with the newly manufactured feet the typewriter now again fits in the case.


The rubber dampens, the felt gives additional cushioning. The embedded textile-glue gives enough grip for the typewriter to stay put when used. This typewriter is on its feet again :)


With these new feet, the refurbishing of this 1939 Underwood Champion is mostly finished. It is clean and usable, but to be fair it is 'worn out'. Apart from the scuffs and scratches of the outside, the inside mechanism is very worn and rather roughly 'patched-up' - so although it is again usable, it probably is not a good representation of what these Underwood Typemaster portables would/could/should be like as a writing machine.


But this 1939 Champion still looks really stylish - swing era!

Tuesday, February 1, 2022

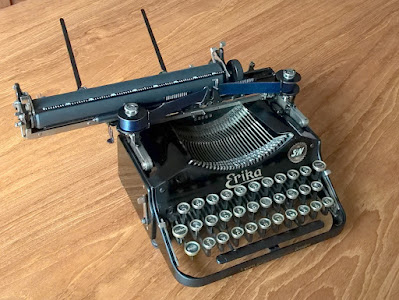
Various small fixes completing the Erika folding typewriter

The little Erika folding typewriter had yet a few extra quirks to be fixed.

Universal bar biasing spring
The universal bar (of the machine-base) has to be in the forward position to mesh correctly with the carriage when unfolding the typewriter. The ribbon vibrator tab (cyan arrow) and the escapement tab (orange arrow) must be caught the right-side, otherwise the carriage blocks and brackets get bent. This machine sometimes did block, mangling the vibrator-bracket. 


To make sure the bar will mesh correctly, a small felt-pad was placed behind the springs that bias it forward. These springs are mounted inside the machine back-plate. 


The felt-pad position can be tweaked to find the lowest added spring-force for reliable meshing. Because this spring is worked against with every keystroke, a lowest possible force is best.

Spacebar travel-limit buffers
A threaded rod on the spacebar holds buffers, moving against a forked tab on the frame. The upper buffer was still present, but it had been squished into the hollow of the metal spacebar. The century-old leather was given an infusion of leather-wax and two felt-pads for extra support.


The lower buffer probably perished decades ago and only two nuts remained on the threaded rod. A new buffer was made by a ring of felt glued to an M3 washer. The upper nut thus falls neatly inside the felt ring and makes the tab rest against the felt as the washer is clamped by the two nuts.

Re-nickeling rusted parts
This folding Erika must have lost its protective cover long ago - if it ever had one. The exposed bell had been damaged and rusted quite badly. Also the spring-drum screw was rather rusty. Even with this rust removed, the bare iron was jarring.


Basic kitchen-table nickel-plating works fine on brass, but not so well on plain steel. To prepare the parts for nickeling, they were first thoroughly cleaned with steel-wool and lightly sanded (random pattern) with fine sandpaper. This gives a smooth surface with lots of little scratches. To help with plating bare iron (or mild steel), the surface was then firmly rubbed with copper tape. Using thin tape allows the soft copper to be firmly rubbed onto the shaped surface and into any small scratches. The parts then have a vague reddish sheen, confirming that copper is indeed lodged in the surface. 

The 'coppered' parts were then nickel-plated with the kitchen-table method. Where brass is done after about a minute, these were left in the electrolyte for over 10 minutes. Afterwards thoroughly washed and then polished-up.


The initial results look credible - especially the screw came out very well. The bell is clearly still pitted, but now again nickeled all-over. It will remain to be seen how long-lasting this fix will be of course, but for now this was a successful experiment :)

Wide ribbon
The typewriter had a regular 13 mm (half inch) ribbon when purchased. These Erika machines however need a 16 mm ribbon. (The narrow ribbon probably was the reason that vibrator-linkages had been bent out of shape a bit, would've been needed to make the too-narrow ribbon work on the machine.)

Whilst new 16 mm inked ribbon can be found, making one from scratch was tried with a length of 15 mm 'satin' ribbon from a local haberdashery store and stamp-pad ink. (According to the MSDS this ink is basically glycerol with colorants.)


Inked by pulling/rubbing the ribbon over an inked pad, building up slowly with test-typing between applications (easier to add ink than to take it away again).


The net-result is not-great, compared to the reference black typing. The ink itself is probably too diluted and not ideal, but also the ribbon is likely too stiff. Nevertheless the machine does type with a wide ribbon and it's legible - functional and ready for use.


New nut!
As a last little fix, that missing nut of the backspace-crank was replaced with a shiny new hex-nut. This time the carriage mechanism still works even! It now only jams-up the backspace key - very occasionally... :) 


The backspace draw-bar may need some more tweaking, but for now pressing the backspace-key with care will do.

Facit
The little Erika folding typewriter is a great tinkering-object, an enjoyable "3D puzzle" to solve. To be honest however, as a typewriter it has not yet impressed. The build-quality is excellent, but the typing feel is cumbersome and the machine feels slow. Almost an opposite to the later Erika M's velvet touch and astonishing print-quality. 


It does look very '1910' and it is great fun though :-)

Friday, January 21, 2022

Adjusting for wear of the escapement of an Erika folding typewriter

Continuing the fixing-up and full cleaning of the Klapp-Erika; with the carriage-mishaps resolved, on to the escapement. Unlike the Standard Folding typewriter, the Erika has a full 'office-machine' escapement complete with star-wheel and intermediate pinion meshing with a rack on the carriage. The Standard (and Corona) solution is much more compact with the dogs working directly on a ratchet-rack on the carriage. This 'full-size' Erika escapement is even a sub-assembly that can easily be removed from the machine by undoing four screws.

In this cast-iron frame the star-wheel is mounted on an axle that is clamped between two adjustable bearings - for free running without play. The star-wheel itself also has a gear-face that meshes with an intermediate pinion held on a pivot-bolt in the escapement frame. 

The pinion's pivot-bolt on this machine needed to be fixed with the lock-nut in just the right rotation-angle to give the gears a friction-free meshing. Some tweaking was needed to make it all fun freely. All parts were first cleaned (white spirit) and bearing surfaces given a polish as well.


After more cleaning and polishing-up the pivot of the sub-frame that 'escapes' or steps the mechanism, the escapement was re-assembled with small amounts of oil and grease on the pivots and gears. Top-right in below picture there can be seen the tab that the typewriter-base gives a push to trip the escapement. The pivot for the sub-frame with the dogs is at the very left. The spring at the bottom-left provides the return of the sub-frame after escaping one position.

After re-fitting the escapement in the typewriter, the little Erika was noticed to 'skip' and 'slip'. When very slowly pressing down the spacebar through its travel, the carriage would suddenly 'slip' and speed away rattling all the way to the left (as if seeking a tabulator-stop). Also, very occasionally the carriage would advance not 1, but 2 or more positions. These are escapement issues...

The problem very probably was already there before the cleaning, just not noticed - at any rate that'd make me feel better about it. When typing normally or pressing the spacebar with a 'normal' stroke, the carriage still functioned fine.

The slipping through the escapement suggested it was not a tripping-point issue, but rather the adjustment of the two dogs as they catch the star-wheel. The likely cause was that the edge of the fixed dog that catches the teeth of the star-wheel wore away just enough to give the star-wheel teeth room to slip between the loose and the fixed dog.

In the Erika's escapement mechanism, the loose dog is pulled by a little spring against the fixed dog - an anvil-surface at its side (green circle) resting against the fixed dog. I.e. there's no way to adjust the assembly to make the gap narrower to compensate for the rounding and wear of the fixed dog. The only way to reduce the gap was to reduce the anvil surface of the loose dog a few tenths of a mm. 

With a grinding-stone in the 'Moto-Tool' and the loose dog held in a vise, the anvil-surface was ground down. Taking off a small amount at a time and then re-fitting and checking for the slippage, a minimal amount of material was removed. Just enough to stop the star-wheel teeth fitting between the dogs.

With some extra shimming under the sub-assembly to improve the meshing of the intermediate pinion with the carriage rack, the carriage escapement is now again mounted and working reliably.

The Erika folding typewriter is actually a nice mechanism to explore and tinker with - nearly everything is visible and easy to get at (notable exception being that pin hiding in te slot of the platen-flange). Most mechanical bits are bolted onto the outside of the typewriter - a machine :)